Even the most experienced professionals can find it challenging to paint bare aluminum. The material touts exceptional strength and beauty, but thorough preparatory procedures are a prerequisite for painting it. Whether you want to restore, protect, or alter the appearance of the aluminum, careful strategizing is crucial to accomplishing the desired goals.
We are taking you through the complete process in this blog, from how to prep the surface of the aluminum’s surface to picking the perfect primer and paint. You will know the critical tools and materials, the need to clean and sand the surface, and how to apply them properly. Ultimately, you will have the knowledge needed to change the bare aluminum into a beautifully painted surface that is unblemished and long-lasting, regardless of the surrounding conditions. This blog is ideal for professionals and DIY enthusiasts looking to enhance their capabilities.
What Supplies Do You Need to Paint Aluminum?

To paint aluminum, you’ll need the following supplies:
- Clean Cloths and Degreaser: To clean the surface of dirt, grease, and oils.
- Sandpaper (120-220 grit) or a Sanding Block: For roughing the surface, use 120 to 220 grit paper.
- Primer (self-etching or aluminum-specific): Apply on the surface of the aluminum to enhance its bonding capabilities.
- Paint (spray paint or paint suitable for metal): Use high-quality paints formulated for metal surfaces.
- Clear Coat (optional): If required for glossy finish and additional durability.
- Protective Equipment: Wear a mask, gloves, and goggles to protect your face and hands during sanding or painting.
- Painter’s Tape and Drop Cloths cover protective areas that need no paint and protect the workstation.
These supplies guarantee a proper, long-lasting paint job on aluminum.
Choosing the Right Paint for Aluminum Siding
When selecting which paint to use on aluminum siding, I prefer using 100% acrylic latex paint because it is very well bonded to metals and resistant to fading, peeling, and cracking. I check that the paint is marked clearly as an exterior grade so that it can endure the weather. Also, I prefer mildew-resistant paints for enduring features, especially on aluminum siding. Moreover, proper paint requires a high-quality metal primer to ensure it is adequately bonded and enduring before applying the topcoat.
Essential Primers: Self-Etching Primer Benefits
Because of its distinct properties, a self-etching primer is critical for any aluminum siding or metal surface project. Self-etching primers aid adhesion and rust prevention by chemically bonding to bare metal. Self-etching primers are optimal for aluminum surfaces due to their smooth and non-porous edges, which traditional primers struggle to stick to.
Key Benefits:
- Improved Adhesion: Topcoats are guaranteed to have a stronghold because self-primers ensure tight bond adhesion by etching the surface.
- Corrosion Resistance: Primers that contain zinc as a self-etch feature offer lower chances of metal rust due to moisture and oxidation.
- Quick Drying Time: Accomplish more work because self-primers dry in 5 minutes.
- Compatibility: Works well with a variety of topcoats.
- Application Guidance:
- Surface Preparation: Scrub all grease, dirt, and oxidized layers.
- Spray Nozzle Pressure: Apply 25-35 psi for ideal outcomes when using a spray gun.
- Coating Thickness: 1-2 mils per layer will assure even coverage.
- Temperature Range: The optimal application temperature is between 50°F and 90°F (10°C to 32°C) coupled with low humidity to allow for proper curing.
Using a self-etching primer can significantly improve the longevity and quality of painting projects on metal, mainly in the open, due to exposure to extreme weather conditions.
Tools and Materials Checklist
- Self-Etching Primer (ensure compliance with 1-2 mils thickness requirements and temperature limits 50°F-90°F)
- Hose with Spray Gun or Aerosol Primer Can (set pressure for the gun to 25-35 psi)
- Sand or Abrasive Pad (both 320 to 400 grades for preparatory work will do just fine)
- De-greaser or Cleaning Agent (made for oil, dirt, and other foreign substances).
- Cotton Rags (to clean the surfaces post-sanding)
- Safety Equipment (safety glasses, gloves, and a mask to protect from inhalable powder or toxic gas)
- Stirring Rod or Container (when mixing the primer, achieve the desired uniform blend).
- Masking Tape and Drop Cloth (for concealed areas unblemished by paint and served as protective).
All needed tools with all claimed parameters guarantee smooth and even application, as proven by the technical recommendations.
How to Prepare Aluminum Surface for Painting

Step 1: Clean the Surface
First, clean the aluminum surface to remove dirt, grease, or residue. Scrub with a degreaser or a mild detergent, rinse with fresh water and ensure the surface is dry before proceeding.
Step 2: Sand the Surface
Sand the aluminum using fine sandpaper or a sanding block to make it a little rough. This will enhance adhesion for the following layers. Dust the surface with a lint-free cloth to remove the dust.
Step 3: Apply a Primer
Choose a primer designed for aluminum surfaces. Using a brush, carefully apply a thin first layer of primer and let it dry according to the manufacturer’s instructions.
Step 4: Mask and Protect Surrounding Areas
Use drop cloths and masking tape to keep areas you wish to paint free from paint splatters. This keeps you from accidentally spraying paint on surfaces you did not intend to.
Step 5: Inspect and Reapply if Necessary
Survey the primed area and check for bumps. If so, lightly sand them down and add more primer to create a smoother finish. This ensures that the paint bonds better and lasts longer.
Step-by-Step Guide to Clean the Aluminum
Step 1: Remove Dirt From The Surface
As a first step, it helps to clean the aluminum surface with a soft cloth or brush to remove loose dirt or debris. This will protect the surface during the cleaning operation and avoid scratches.
Step 2: Prepare the Cleaning Solution
I like to use a bucket to mix warm water with mild dish soap. If the surface needs more intensive cleaning, I can also use an aluminum cleaner designed for that purpose.
Step 3: Wash the Aluminum
I can gently scrub the aluminum with a sponge or a visually non-abrasive cloth while paying close attention to all stains and/or other residues. If needed, I use a toothbrush to reach tight or intricate areas.
Step 4: Rinse each component thoroughly
Then, I pour aluminum into clean water and rinse off all soap and cleaners. This step is crucial for ensuring that authenticity is preserved and surfaces are left gleaming.
Step 5: Polish and Dry
My last step is to use a soft towel or polymer cloth to gently rub the aluminum clean while ensuring the fabric is soft. If I wish to increase the existing shine, I will apply aluminum polish based on the provided instructions.
Proper Way to Sand the Aluminum
Like all metals, aluminum requires care and applying the proper tools when being sanded in order not to cause damage to its surface. Each of the following steps will guarantee that you achieve the smooth and polished results you are after:
- Prepare the Surface
Firstly, scrub out the aluminum wholly and carefully so it is void of dirt, grease, and oxidation. A degreaser or a mixture of dish soap and water is recommended. Also, don’t forget to dry the surface before sanding so it is devoid of water.
- Choose the Right Sandpaper
First, ensure you have coarse grit sandpaper, specifically 120 to 150 grains, and use it to remove major flaws and oxidation. Make sure to use finer sandpaper, like 320, 600, and 1200 grit, to achieve a smoother finish. Always use durable silicon carbide or aluminum oxide sandpaper, as they are the paragons for aluminum work.
- Sand with Consistency
Use light, even, and consistent pressure to sand the aluminum so as not to cause scratches. In addition, make sure to always work in the same direction. Use sanding blocks or sponges to make it easier to tackle intricately shaped areas.
- Work Wet or Dry
Wet sanding is preferred to improve the final result and avoid material overheating. A spray bottle filled with water or a lubricant meant for sanding can keep the surface cool and maintain a required level of dampness. Dry sanding has its uses in the initial stages but does not work well for detailed finesse.
- Finishing Touches
The last step is sanding with the finest grit possible, after which the surface should be cleaned with a microfiber cloth to remove any residue. A finishing compound or polish must be applied after sanding for a polished look. The desired sheen can also be achieved after buffing the surface with a soft pad or cloth.
Aspects for Sanding Aluminum:
- Coarse Removal: Use 120-150 grit.
- Intermediate Smoothing: Use 320-600 grit.
- Fine Polishing: 800-1200 grit. A higher grit may be used depending on the required finish.
- Wet Sanding: With water or lubricant for damp sanding, heat permitting, results will be smoother.
Professional parameters and steps ensure a smooth finish on the aluminum’s surface.
Ensuring the Paint Adhesion: Surface Treatment Tips
To prepare an aluminum surface for painting, I undertake quite a process, which includes cleaning, sanding, and priming the surface of the aluminum. To begin with, I clean the surface using a degreaser or soapy water, which removes the oils, dirt, and any other contaminants that may be present. After that, I sand the aluminum to create a slightly rough layer that helps with paint adhesion. For this step, I use around 320 to 400 grit sandpaper. Upon finishing the sanding step, I ensure that all debris is wiped away and then apply the self-etching primer, known to bond to the aluminum surface by chemically etching into the metal.
- Degreasing Cleaner: A safe degreaser or soap works best for aluminum surfaces.
- Sanding: 320-400 grit sandpaper provides the best texture for the surface.
- Primer Application: The best results are seen with self-etching primers.
- Drying Time: Follows manufacturer primer instructions.
These steps helped me achieve a professional and durable finish with the paint perfectly bonded to the aluminum surface.
What’s the Best Primer for Aluminum?

Applying self-etching primers lasts longer than others. Manufacturers recommend it for aluminum as it is guaranteed etching builds a ferrous oxide bond with the metal. Alodine will dissolve the oxides and, in turn, facilitate bonding with the surface of aluminum using a reverse reaction. Self-etching primers safeguard against crumbling and uncovering scars while remaining active for varnishing or painting and accomplishing aesthetically superior work. For reliable results, strictly adhere to the instructions for curing and application.
Why Self Etching Primer Works Best on Bare Aluminum
Aluminum has always presented unique challenges, especially in painting, as it doesn’t allow any layer of aluminum anything to bond on a molecular level. This bond is determined by the resistance of the item being painted with aluminum to heat and its ability to peel on the alodine surface in time. For varnishing work, I highly recommend using quadrant gauges; this is especially true for multifunctional ones, as wrought gauges are guaranteed to meet the crossing standards for crumbling along and uncovering low-build scars.
How to Apply the Primer Correctly
Applying a primer on aluminum requires specific procedures for optimal adhesion and a professional look. Follow these steps for the best results:
- Surface Preparation:
As with anything, the first thing to do is clean the aluminum surface of debris, grease, or even oxidation. Using a degreaser or just soap and water, followed by a rinse and thorough drying, should do the trick. If you are dealing with oxidation, aluminum etching is also an option. Sand the area to be etched using 320-400 grit sandpaper, as this roughens the surface and enhances the adhesion of the primer. Use a clean cloth to wipe the surface of the clean dust resulting from sanding.
- Masking the Area:
Use masking tape and drop cloths to cover up adjacent parts. Ensure precise cutting so the area is neat and clean once the tape is removed.
- Choose the Right Primer:
Select a self-etching primer. These are specifically designed to form bonds with aluminum on a chemical level. Acid-etch or zinc-chromate primers work well. Check that the product specifications and drying times are in line with what was provided by the manufacturer.
- Application Process:
-
-
- Mixing the Primer: Shake the can or mix it with an agitator as outlined in the instructions to ensure the formulation is uniform.
- Applying the Primer: To achieve uniform distribution, Universal Chassis Black can be sprayed or brushed, the latter being recommended for touch-ups. To avoid dripping, one should strive to keep the spray distance of 8-12 inches consistent. Thin, uniform layers are preferred.
- Drying Time: The first coat needs to dry for 15 minutes—30 minutes or according to the universal guidelines. If additional coats are required, the universal guidelines must be followed.
-
- Curing Process:
The primer must remain unbothered for 24-48 hours until fully cured. This will vary based on the product used and external factors such as heat and humidity, but it needs to be adequately ventilated.
- Sanding Between Coats (if applicable):
Fine-grained 400-600 grit sandpaper can be used if the manufacturer allows multiple coats to smoothen the surface after drying.
Carefully adhering to these steps with quality materials ensures the best results. Always check the manufacturer’s guidelines on the primer for any additional tweaks needed.
Primer Drying Time and Considerations
In my experience and some research, I have learned that the drying times for primer vary based on the type of primer and the temperature and humidity levels. Generally, most primers have 30 minutes to 1 hour for the surface to feel dry to the touch. However, a complete curing process can take 24 to 48 hours. To achieve optimal results, make sure that the temperature is between 50°F to 90°F which is around 10°C to 32°C, and the humidity is less than 85%.
Some aspects to consider include:
- Dry-to-Touch Time: 30–60 minutes.
- Recoat Time (if multiple coats are needed): If recoating is required, the recoat duration, as specified by the product guidelines, will be around 1-2 hours.
- Full Cure Time: A complete cure time of 24-48 hours is expected to ensure a stable and protected finish.
Most importantly, follow the guidelines set by the primer’s manufacturer, as they tend to have recommendations explicitly designed for their product.
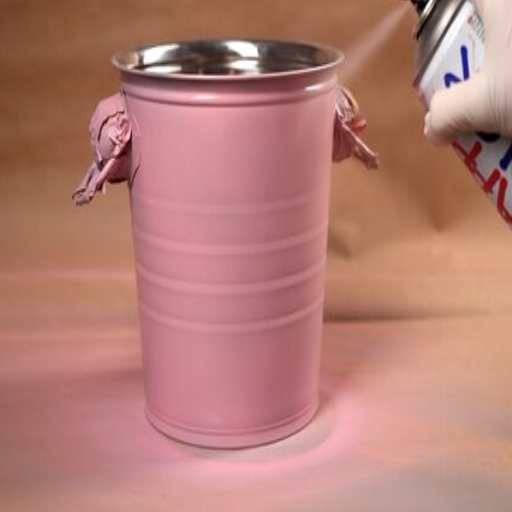
How to Apply the Paint to Aluminum Successfully
Here are the steps you need to take if you wish to paint an aluminum surface successfully:
- Clean the Aluminum Surface: Start washing the surface thoroughly, removing all grease, dirt, and contaminants. Clean the surface using a degreaser or mild detergent, rinse, and dry.
- Prepare the Surface: Finely sand the aluminum using sandpaper with a grit count of 180 to 220 to create a surface to which the paint can stick. Then, remove all dust and residues with a lint-free cloth.
- Primer Application: The selected primer should have been designed explicitly for aluminum. A thin, even layer should be applied and allowed to dry within the manufacturer’s specified time provisions.
- Applying Paint: Use paint specifically designed for metal surfaces, such as epoxy-based or acrylic paints. Using a brush, roller, or spray, apply an even and thin layer, letting it dry before adding subsequent layers.
- Allow to Cure for up to 48 hours, depending on the number of layers applied. For the most durable finish, do not handle or put the surface under stress while the paint is curing.
Following these steps alongside product-specific instructions will achieve a long-lasting and smooth finish on the painted aluminum surface.
Spray Paint vs. Brush Application Techniques
Both spray paints and brushes can be helpful tools depending on the context of the project on hand. For example, an incredibly detailed design or smooth finish on aluminum would be perfect for spray painting. Spray painting is the better option when a faster, more professional look is desired. The downside is that spray painting is messier and requires a well-ventilated area. On the other hand, paintbrushes are better for more minor detailed work and give the user more control. Paintbrushes are a more economical option since they do not require as much preparation as spray painting. In a nutshell, I tend to use a brush when precision is required and a paintbrush when there is a need for consistency and speed.
Applying Multiple Coat of Paint for Best Results
Using multiple coats of paint boosts durability and coverage and improves the quality of the finish. These steps will make sure optimal results are achieved:
- Surface Preparation: Cleaning the surface is the best step to ensure that dust, grease, or previously chipped paint is not stuck. Sanding the surface for better texture will also improve adhesion. A primer would be advantageous if the surface is porous, rough, uneven, or the color changes profoundly.
- Drying Time Between Coats: Be sure to patrol the time as the manufacturer directs and leave adequate time for curing, around 2-4 hours for water- and 6-8 hours for oil-based paints. Water-based paints have lower curing times, around 2-4 hours, and oil-based paints take up to 6-8 hours, meaning workability is unchanged while curing progresses. Defects caused by improper curing, like bubbling or peeling, are avoided.
- Number of Coats: Depending on the paint type and desired finish, apply the correct number of coats. Two coats should usually do the job; however, some surface types may require three or more coats, while dark colors, high gloss, or textured surfaces require more to achieve uniformity.
- Application Techniques: Avoid brush or roller overload, as it makes even strokes difficult and results in uneven application. Maintaining distance is vital to avoid drips and uneven application with spray paint. Adequate ventilation and protective gear remain constant.
- Temperature and Humidity Considerations: Finish quality changes heavily with moisture, while application temperature should rest between 50°F and 85°F, so it is key to pay attention. Depletion of technical data paint sheets should always be verified.
- Sanding Between Coats (If Required): For a smoother finish, especially on glossy or highly detailed work, lightly sand between coats using fine sandpaper, such as 220-grit. Remove the dust with a tack cloth before applying the next coat.
With proper best practices and following manufacturer specifications, such as instructions, you will achieve the finest results in elegant appearance and durability.
Tips for Painting Aluminum Siding Without Streaks
I use the right tools and good techniques to prep the aluminum siding before painting it to avoid streaks. I remove all the dirt, mold, and old paint from the siding to get the best results. This helps the paint stick to the surface. A pressure washer is a good tool for cleaning. Once the surface is dry, I tend to any dents, peeling areas, and rough spots by sanding them down. This will help the new paint stick to the surface better. I always use a high-quality bonding primer for metal surfaces as it helps achieve smooth and even siding. I also use 100% acrylic exterior paint and apply it using a paint sprayer or a good-quality brush for even application. To prevent streaks, I work on small portions and blend the strokes. For the best results, avoid painting on hot days, direct sunlight, or extremely humid days, and try to keep the temperature in the 50-85 °F range.
What Type of Paint Works Best on Aluminum?

Latex or acrylic paints, specially made for metal surfaces, are the best options when painting aluminum. Such paints ensure proper adhesion, flexibility, durability, and resistance to elements. For best results, opt for 100% acrylic paint specifically for exteriors since it resists peeling and fading from sun exposure. A metal primer must be used with the paint to guarantee lasting performance.
Acrylic Paint Benefits for Aluminum Surfaces
Acrylic paint works best on aluminum surfaces. Its adhesion, durability, and weather resistance make it ideal for outdoor applications. The paint does not peel or fade, which helps maintain the surface’s functionality. For the best result, applying metal primers under the paint guarantees a smooth finish.
Latex or Acrylic: Which Paint to Choose
It is essential to consider properties and applications when choosing between latex and acrylic paints effectively.
Latex Paint:
Latex paint has a water base, making it easier to clean and environmentally friendly. It is best for finishing work in interior areas because it dries rapidly. Compared to acrylic, latex paints are less flexible, which may affect their durability in extreme temperatures or on wood and outdoor metal surfaces that expand and contract. Essential features are moderate water resistance and a 1-2 hours drying time for touch and 4-6 hours for recoating.
Acrylic Paint:
Acrylic paint is made using mechanical processes, so it’s more weather-resistant. Its flexibility and adhesion to metals, masonry, and wood make it suitable for expanding and contracting surfaces. UV rays, cracking and peeling make this paint great for outdoor projects. It has a longer drying time than latex, approximately 2-4 hours for touch and 6-12 hours for recoating, but it has stronger adhesion and weather resistance.
When to Choose Which?
- With exposure to mild climate conditions, latex paint is suited for indoor walls, ceilings, and other areas with stable temperatures.
- Acrylic paints are flexible and can withstand harsh weather conditions, making them ideal for aluminum siding, decks, and stucco.
Choosing between acrylic and latex paints can be done confidently if you consider the factors concerning the project’s requirements and the environment.
Specialized Exterior Painting Products for Metal Surfaces
For outdoor painting of metal surfaces, I suggest using specialized applicators that cater to the uniqueness of such materials. Epoxy paint is a good candidate for these, alongside oil-based enamel paints, as they are known to withstand corrosion. Also, consider UV-resistant and weatherproof labels, as the paints need to endure sunlight and moisture.
- Rust-Inhibiting Primer: Performs well in preventing rust formulation. Zinc-rich protects superbly against corrosion.
- Adhesion: ASTM D3359 rating of 4B for strong bonding denoting superb adhesion.
- Durability: Endurance against outdoor conditions equal to or exceeding five to ten years of rigorous exposure and wear.
- Temperature Range: Capable of stabilizing centered around -20°F to 120°F, or -29°C to 49°C.
- Finish Options: Matte, satin, and gloss offer aesthetic enhancement, depending on preference.
Remember to clean, remove rust, and sand the surfaces for the best results before applying these products.
References
Frequently Asked Questions (FAQ)
Q: What’s the best way to paint aluminum for a lasting finish?
A: The best way to paint aluminum is to follow a methodical process. First, thoroughly clean your aluminum to remove dirt and grease. Then, sand the surface lightly to create a profile that allows the paint to adhere correctly. Apply a high-quality etching primer explicitly designed for metal surfaces. Once the primer has dried completely, apply thin coats of paint designed for metal, allowing the paint to dry between applications. For outdoor items, finish with a clear protective topcoat. This process ensures proper adhesion and protects the paint from chipping or peeling.
Q: Before starting my paint job, do I need to sand the aluminum?
A: Yes, sanding is a crucial step in the painting process. Aluminum is naturally smooth, making it hard to paint effectively without preparation. Light sanding with 220-grit sandpaper creates a slightly rough surface that helps the paint bond with the aluminum. This step creates microscopic scratches that give the primer and paint something to grip onto. Without sanding, you’ll likely experience peeling or flaking as the paint struggles to stick to aluminum’s naturally slick surface. Be careful not to sand too aggressively; you only need to scuff the surface, not remove material.
Q: Can I use latex paint on aluminum surfaces?
A: While latex paint can technically be applied to aluminum, it’s not ideal for most aluminum objects. Latex paint tends to have adhesion issues with metal surfaces. Use acrylic enamel or oil-based paints formulated explicitly for metal for better results. These paints are designed to flex with the aluminum’s natural expansion and contraction and have better adhesion properties. If you must use latex paint, use a high-quality primer intended for metal surfaces first, and allow significant drying time between coats. Remember that latex paint may not provide the same durability as aluminum or specialty metal paints.
Q: What primer should I use when painting aluminum?
A: For aluminum, you’ll need a self-etching primer designed explicitly for non-ferrous metals. This unique primer contains mild acid that microscopically etches the aluminum for the best bond. Self-etching primers prepare the aluminum surface by slightly dissolving the top layer, creating a chemical bond that helps paint stick to aluminum much more effectively than standard primers. After applying the etching primer, allow it to fully cure according to the manufacturer’s instructions before using your topcoat. This step is critical – skipping proper priming is why many paint jobs on aluminum fail prematurely.
Q: How do I properly clean aluminum before I start the painting process?
A: To properly clean your aluminum before painting, wash the surface with warm, soapy water to remove dirt and debris. For deeper cleaning, use a solvent like mineral spirits or acetone to remove oils and grease that prevent paint from adhering. You might need a metal cleaner with phosphoric acid for oxidized aluminum. Rinse thoroughly and allow the surface to dry completely. Any residue left on the aluminum can compromise your paint job, so this cleaning step is essential for preparing aluminum for the best bond with primer and paint. Wear appropriate protective gear like gloves and eye protection when using cleaning chemicals.
Q: How long does paint dry on aluminum surfaces take?
A: Drying times for paint on aluminum vary depending on the type of paint used, humidity, and temperature. Generally, most metal paints are touch-dry within 1-2 hours, but allowing the paint to cure fully takes much longer. For optimal results, wait 24 hours between coats and let the final coat cure for at least 72 hours before heavy use. Oil-based paints typically take longer to dry than water-based options. Following the specific drying times listed on your paint can be essential during the painting process, as rushing between coats can lead to adhesion problems. Patience is key to a successful paint job on aluminum surfaces.
Q: Can you provide a step-by-step guide to painting aluminum successfully?
A: Here’s a comprehensive step-by-step guide to painting aluminum: 1) Clean the aluminum object thoroughly with soap and water, then with a degreaser. 2) Sand the entire surface lightly with 220-grit sandpaper to create a profile for the paint to stick to. 3) Wipe down with a tack cloth to remove dust. 4) Apply a self-etching primer in thin, even coats. 5) Allow primer to dry completely according to manufacturer instructions. 6) Sand the primer lightly if needed for a smoother finish. 7) Apply your chosen metal paint in thin, even coats, working in one direction. 8) Allow adequate drying time between coats. 9) Apply a protective clear coat if desired, especially for outdoor items. 10) Let the final coat cure thoroughly before using the item.
Q: What are the most common mistakes that can ruin a paint job on aluminum?
A: The most common mistakes that ruin aluminum painting projects include inadequate cleaning, which leaves residues that prevent the paint from adhering; skipping or using the wrong primer, which is essential for getting paint to stick to aluminum; not correctly sanding the surface; applying paint in conditions that are too hot, cold, or humid; rushing the process by not allowing sufficient drying time between coats; applying paint too thickly, which can cause dripping and uneven drying; and using low-quality paint not designed for metal surfaces. Another frequent error is neglecting to protect the paint with a clear topcoat when the aluminum is exposed to the elements or requires frequent handling.


