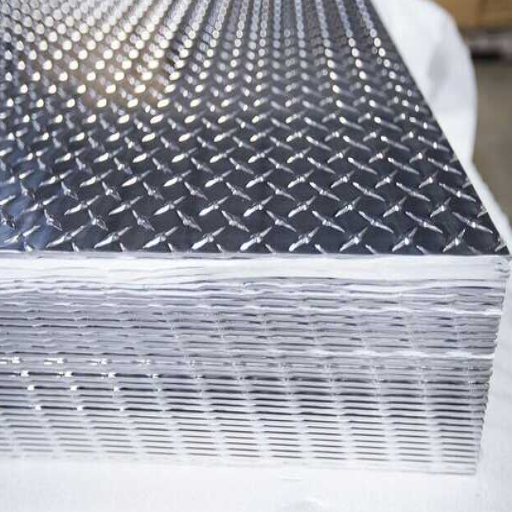
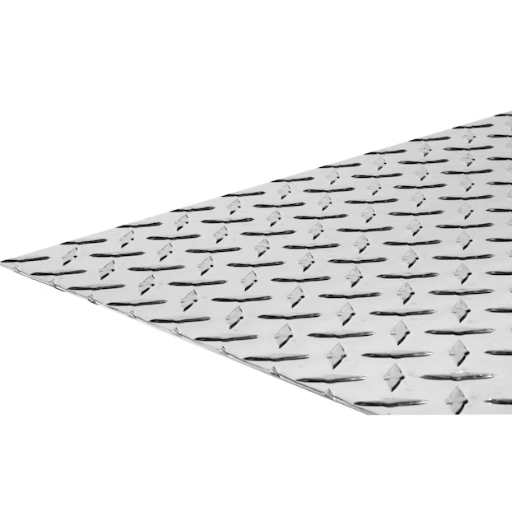
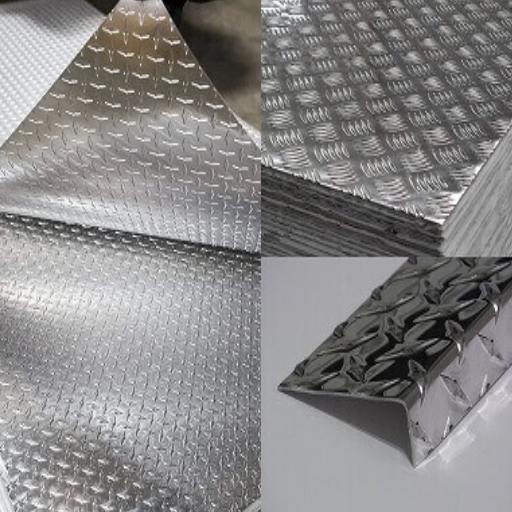
The sheen of aluminum diamond plate is balanced with its strong structure, glossy look, and elegance; however, with time, it may lose its charming shine or clash with the design of the remaining elements in the space. Painting an aluminum diamond plate is an excellent practical approach and an innovative, long-lasting solution for wear and tear by improving the aesthetics of the diamond plate and adding an extra layer of protection. You don’t have to worry about any steps since this guide will provide detailed directions so that the result can resemble the quality of specialist work.
We want you never to skip a detail, so you will find handy hints to help you avoid any adventure that might lift the surface seal and reduce longevity. This step-by-step guide ensures success when tackling a residential or commercial remodeling project, offering the information necessary to gain self-assurance and quickly transform any aluminum diamond plate.
What Preparation Steps Are Needed Before Painting Aluminum Diamond Plate?
Proper Cleaning and Degreasing
Surface cleaning is a crucial step that should be performed before painting the aluminum diamond plate. It includes eliminating dust, grease, contaminants, etc. Cleaning can be performed using a degreasing solvent or simply soap and water to achieve the previously mentioned goals. After scrubbing mildly, rinse and leave to dry for better results.
Sanding the Surface
When preparing a surface for painting, sanding is crucial to create a texture that helps the paint stick better. You should use fine-grit sandpaper with approximately 220 grit and lightly scuff superficial surfaces, paying attention to cut-outs and the sides of the diamond shape. Ensure to use a clean, dry cloth to remove any sanding debris.
Applying a Primer
Using a primer specifically made for aluminum or metal surfaces is essential for paint to bond well and resist chipping. Following the manufacturer’s instructions, apply a thin coat of primer and let it dry completely before continuing to paint.
How to Clean the Aluminum Surface Properly
To adequately clean the aluminum surface, I fill a basin with warm water and a mild detergent to eliminate dirt, grease, or other debris. I use a soft-bristle brush and a non-abrasive sponge to scrub the surface without scratching it. After, I rinse it with clean water to wash off any leftover soap. I use a white vinegar and water solution or a commercial aluminum cleaner, following the product instructions for more stubborn stains or oxidized surfaces. The final step is to wipe the surface with a clean, lint-free cloth to forgo water stains and corrosion.
Removing the Oxide Layer for Better Paint Adhesion
Removing the oxide layer is very important to prepare an aluminum surface for painting, as it will ensure the paint adheres to the surface optimally. When the aluminum surface is exposed to air, it develops a protective oxide layer. This layer can impede adequate paint bonding. Here are the best-recommended methodologies with the most essential steps and details condensed:
- Surface Preparation:
-
-
- To prepare the aluminum surface, clean it thoroughly using water and a mild detergent to remove all traces of grease, contaminants, and dirt.
- Ensure that the surface is rinsed and dried thoroughly to prevent hindering the process of oxide layer removal.
-
- Mechanical Abrasion:
-
-
- Scrub the surface with fine-grit sandpaper –220 grit to 320 grit—or a scuff pad to roughen it moderately, which aids the paint bond.
- To achieve consistency, use circular or back-and-forth motions.
- After sanding, remove debris with a clean, lint-free cloth or compressed air.
-
- Chemical Removal:
-
-
- To remove the oxide layer, apply an etching aluminum solution, most commonly containing phosphoric acid or alkaline cleaners; follow product guidelines on dilution ratios and contact times.
- Most etching solutions become too effective after 3 minutes, but they must not be used for more than 5 minutes lest surface damage ensue.
- Always, without exception, rinse afterward using clean running water to eliminate any remnants from the chemical wash.
-
- Acid-Based Etching for Precision:
-
-
- A 5-10% phosphoric acid concentration is recommended to optimize oxide removal without unnecessary material degradation.
- The work area must be adequately ventilated, and gloves, goggles, and a mask must be worn as part of personal protective equipment (PPE).
-
- Final Surface Neutralization:
-
-
- Post acidic or alkaline treatment, the surface should be neutralized with a mild baking soda solution (roughly one tablespoon per cup of water) to stabilize the pH.
- It is critical to rinse thoroughly, ensuring that no water is left on the aluminum surface before applying primers or paint, as it must be scorched.
-
These procedures guarantee that the aluminum surface is adequately prepared for painting and ensure a professional, long-lasting finish.
Using Mineral Spirits and Detergent for Thorough Cleaning
Aluminum surfaces must be cleaned using a combination of spirits and detergent before paint is applied. The recommended outline starts with wiping the cloth soaked in mineral spirits to remove oils, grease, and other contaminants. The next step involves mixing a detergent with warm water and using a non-abrasive sponge or brush to scrub off any remaining dirt and residues. Once rinsed off, the aluminum surface must be dried with a lint-free cloth to avoid visible streaks. Ideally, ensure that the aluminum surface is dehydrated without any film when further prep or paint is applied for better results.
Should You Sand the Aluminum Diamond Plate Before Painting?
Indeed, it is ideal to sand aluminum diamond plates before painting. Sanding creates just the right surface profile for paint adhesion and long-lasting durability. One should use fine-grit sandpaper or a sanding pad as gentle as a scuff and not scratch the surface too deeply. Once all dust and particles have been removed, a clean, sanded plate is ready for primer or paint.
Best Sandpaper Grit to Use on Diamond Plate Aluminum
In my research, the most effective sandpaper grit on diamond plate aluminum is 220 to 320. This level of softness will also help improve adhesion without creating deep scratches or gouges. It is vital that the sanding be light but thorough to ensure the paint will stick to the plate while its texture is preserved. That said, thorough cleaning is crucial to obtaining the desired results.
How to Scuff and Sand Without Damaging the Pattern
To gently scuff and sand diamond plates without altering their pattern, these steps must be adhered to:
- Choose the Right Sandpaper Grit
A finer grit between 220 and 320 should be employed. Specific design patterns will be preserved while achieving varying levels of smoothness as long as deeper cuts into the surface are avoided. Lower grit numbers would be more detrimental to the diamond texture and likely leave scratches; therefore, they should be avoided.
- Use Consistent, Light Pressure
Avoid pressing harder on one side of the workpiece while sanding. If the aluminum grain is visible, work along the direction of the grain to minimize the loss to the surface geometry.
- Opt for a Sanding Block or Sponge
A sanding block or a sanding sponge provides better control and more even application, especially at the borders of the diamond shape. These tools also help even out the application of force.
- Prepare the Surface Before Sanding
Attempt to thoroughly clean your diamond plate with a degreaser or soapy water. A clean surface makes it easier to see the pattern and helps prevent dirt from becoming trapped when sanding the material.
- Monitor Your Progress Frequently
Inspect your progress periodically. Be sure to remove residue from the part you are working on, as you may sand off too much material or damage the surface detail.
- Follow with Surface Cleaning
After sanding, clean the piece of aluminum with a microfiber cloth and some alcohol or a less aggressive cleaning agent to remove all dust remnants and prepare the aluminum for subsequent steps, such as painting or polishing.
Following these guidelines and using the right materials will allow you to successfully maintain diamond plate aluminum’s structural integrity and aesthetic appeal while scuffing and sanding it.
Using Scotchbrite Pads as an Alternative to Sandpaper
Scotchbrite pads are an excellent substitute for sandpaper when working with diamond plate aluminum. These pads are great for the initial stages of surface preparation when less abrasive methods are preferred. You can also accomplish different results depending on the grade of the Scotchbrite pad used. For instance:
- Fine (Gray) pads are suitable for light polishing and giving the aluminum a smooth finish.
- Medium (Maroon) pads work well for removing oxidation and surface contaminants.
- Coarse (Brown) pads provide more aggressive abrasion for more demanding cleaning or preparation tasks.
When using Scotchbrite pads, meeting the requirements with the appropriate pad grade is essential. Moreover, applying the same pressure throughout and working along the material’s grain is crucial. For areas requiring more finesse, it is best to use the tools manually; however, pads can be fastened to rotary tools for less detailed areas. This allows the equipment to prepare the surface while ensuring the aluminum is not poorly damaged.
What Type of Primer Works Best for Aluminum Diamond Plates?

For aluminum diamond plates, the preferred option is an etching primer or a self-etching primer. These primers are designed to grab hold of non-porous materials such as aluminum, yielding exceptional adhesion and a reliable foundation for paint. Optimal results will be achieved if the surface lacks grease, oils, and dirt before applying the primer.
Benefits of Self-Etching Primer for Bare Aluminum
Applying a self-etching primer used on uncoated aluminum promotes adhesion due to the chemical bond established with the surface. This takes care of chipping, flaking, and other issues arising from untreated aluminum over time. Self-etching primers also promote corrosion resistance, guarding materials from deterioration due to rust or other damaging environmental factors. I can rely on this type of support because it allows me to prepare my aluminum with smooth primers, resulting in an even base that improves the durability and aesthetics of my paint.
How to Apply Zinc Chromate Primer for Maximum Adhesion
Here are the steps to get the best results from the applications of zinc chromate primer as regards adhesion and performance:
- Surface Preparation:
Cleaning the aluminum surface should be the first step. It should be free of contaminants such as dirt, grease, or anything else. Strong solvents such as acetone or mineral spirits should do the trick. If the aluminum surface has oxidation or paints older than the Z-Score, use fine-grade sandpaper ranging from 220 to 320 grit or wire brushes to slightly abrade the surface. This will help the primer stick to the surface. Use clean, lint-free cloths to wipe the surface after sanding.
- Mixing the Primer:
Give the zinc chromate primer a good shake because the pigments and binding agents need to be mixed thoroughly. If the manufacturer recommends thinning (usually done with compatible solvent xylene), then do so. The thinning should depend on the spray method or application that has been selected.
- Application Guidelines:
-
-
- Use quality primer guns, brushes, or rollers to apply the primer in smooth and consistent thin coats.
- If you are using a sprayer, maintain a distance of 8 to 12 inches between the surface and the nozzle.
- During drying time, do not apply additional coats before reaching the minimum 15 to 30 minutes for the first coat.
-
- Drying and Curing:
Complete the primer’s curing process before adding any topcoat coats. Most zinc chromate primers require curing at room temperature 68F (20C) for 4-6 hours. Check the technical datasheet for product-specific drying times and conditions.
- Safety Precautions:
-
-
- Ensure proper ventilation for the workspace as zinc chromate contains toxic elements, or use appropriate respiratory gear.
- Remove from direct contact by wearing gloves, goggles, and protective clothing.
-
Maximum adhesion and protection are achievable for any project by following these steps and strict technical specification guidelines.
When to Choose Epoxy Primer for Aluminum Surfaces
When deciding whether to use epoxy primer on aluminum surfaces, I consider a project that requires constant maintenance for adhesion, long-term durability, and extreme corrosion resistance. My choice will ultimately be epoxy prime when preparing aluminum for extreme environments and substrates with high moisture levels, chemicals, or intense heat. The bond formed between aluminum and coating layers results from epoxy creating strong bonds and guarantees enhanced durability.
Aspects to Consider:
- Mixing Ratio: 2:1 (parts hardener to epoxy resin), though checking the product’s data sheet for more accurate ratios is advised.
- Dry Film Thickness (DFT) – recommended to be [1.5-2.0 mils] or [38-50 microns].
- Curing Time—Depending on the epoxy shear strength or bond strength and its curing time, keep curing for 24-48 hours at 25°C (77 degrees Fahrenheit).
- Application Temperature – Temperatures between 50F – 95F (10°C – 35°C) are optimal.
An epoxy primer guarantees that the aluminum surface is prepared suitably for coating or painting, ensuring long-lasting performance. Always review the technical documentation for instructions tailored to your specific requirements.
How to Properly Apply Paint to Aluminum Diamond Plate
- Clean the Surface—The first step involves thorough cleaning using a degreasing agent. The surface must be free from oil, dirt, and residues and dry before proceeding with additional steps.
- Sand the Plate – To facilitate paint adhesion, roughen the surface with fine sandpaper. After sanding, clean the surface to eliminate any residual dust.
- Apply an Epoxy Primer—An epoxy primer should be used for every coating, making certain to apply it evenly as recommended by the manufacturer. Wait the required 24–48 hours before proceeding with the second step.
- Choose the Right Paint—When selecting paint for aluminum surfaces, always choose good quality, which is more effective and durable. In our case, high-performance paint must be determined.
- Paint in Thin Layers – Smoothen camo finish by ensuring proper coating application and sufficient drying time.
- Seal the Surface—Once the paint has dried, a clear sealant will be a good option to extend the coating life after paint application.
These guidelines will ensure clean edges and optimal adhesion for a well-painted aluminum diamond plate surface when followed precisely. Adhering to product specifications ensures achieving the desired results.
Spray Paint vs. Brush Application Techniques
I can confidently state that employing a brush or spray paint technique has unique merits relative to the type of project one is trying to work on. For instance, spray painting is best when one needs to achieve a seamless finish, for example, when working on aluminum diamond plates, and when painting large areas more quickly because, unlike brush painting, there is no need for meticulous attention to detail. The opposite is true for brush painting, where there is the need for control, for example, in intricate detailing or smaller areas. Regarding detail work, I would suggest that brush techniques be applied for edges, while spray paint techniques can be used in more extensive and open areas.
How Many Coats of Paint Are Needed for Durability
The number of coats required for long-lasting durability varies with the kind of paint used, the surface being painted, and the desired finish. Most specialists agree that at least 2-3 coats should be applied for durability, uniformity, and esthetics.
- Primer Layer: Eliminating a primer results in a lack of sufficient adhesion, which can cause paint peeling. Thus, for surfaces made of metal, wood, or even those that were previously unpainted, it is always ideal to start with a good-quality primer.
- Base Coats: Two coats of the main color should be sufficient for most surfaces. However, the number of coats may need to be increased for previously painted surfaces with darker colors or water-based paints like acrylic and latex.
- Topcoat or Sealant (Optional): For outdoor projects and areas with heavy wear and tear, apply a clear protective coat to add moisture, UV light, and abrasion resistance.
For optimal results, allow sufficient time for paint dragging for both ‘curing’ and ‘bonding’ for inter-layers and covering solvent-bound polymer layers, at least 2-4 hours on latex, and even up to 24 hours on oil-bound paints.
Letting Each Coat of Paint Dry Properly
To achieve a professional-looking finish, one must be meticulous and let every single layer of paint properly dry. This is why I always stick to the provided guidelines: 2-4 hours for latex and up to 24 for oil. Too often overlooked, ambient factors such as humidity, temperature, and air circulation significantly impact paint curing speeds. In my case, best results can be achieved when the air circulation is optimal, temperature is moderately controlled between 50°F-85°F, and humidity is non-existent (over 70%). By following these, I can achieve what is deemed as a ‘high-quality’ paint application result that lasts for years.
What Are Common Mistakes When Painting Aluminum Diamond Plates?
A standard error that people make is not showering the surface with proper cleaning and degreasing. This is important when trying to paint aluminum diamond plates if one seeks to attain adequate paint adhesion. Another error would be forgoing the primer designed for metals because this is equally important in ensuring the paint adequately bonds to the aluminum. Due to the thick application of paint, not allowing appropriate painting drying time between coats, and using inappropriate paint, premature wear and flaking can arise. Steering clear of these mistakes enables one to achieve durable, professional-grade results.
Why Paint Might Scratch or Peel from Aluminum Surfaces
Skimming surface preparation and combining incompatible materials leads to scratching or peeling paint on aluminum surfaces. Based on prior experience, lacking thorough cleaning or applying an aluminum-specific primer often results in loosened paint adhesion. Besides, using inappropriate outdoor metal paint results in flaking and premature deterioration. Achieving these unhealthy guidelines ensures no peeling or cracking. These issues can be eliminated by exercising product selection and thorough preparation.
Preventing Aluminum from Oxidizing After Painting
To prevent aluminum from oxidizing after painting, it is crucial to use a proper sealant or protective coating tailored to aluminum. One must also thoroughly clean aluminum by removing existing oxidation before painting. For adhesion purposes, employing etching primers for aluminum will help thwart oxidation.
Once the paint has dried, apply a clear coat or a protective sealant to protect against moisture, environmental elements, and oxidation. Polyurethane and epoxy-based coatings fare well against water and air infiltration, making them suitable. Be sure to store the painted aluminum in a low-humidity space during “curing” and “drying,” as excess moisture would harm the coating.
- Etching primer application: Apply primers as recommended. Most guidelines suggest 1-2 thin coats, so try to achieve that. Coats must be dried for 15 to 20 minutes before applying the next coat.
- Paint thickness: Maintain consistency by staggering painting in multiple layers of 1 to 2 mils, achieving the desired thickness of 0.001-0.002 inches.
- Precise sealant drying time: Most sealants take 24 to 48 hours to cure at 68 to 77 degrees Fahrenheit and low humidity.
Cleaning the aluminum surface using non-abrasive cleaners as part of routine upkeep will further preserve the life of the protective coating and paint.
Avoiding Bubbles and Uneven Application
I concentrate on three steps to prevent uneven application and bubbles on aluminum surfaces. First, I check that the surface is clean, dry, and free of grease, dust, or other contaminants, as all those will inhibit adhesion and lead to imperfections. Moreover, applying high-quality paint specifically designed for metal surfaces in controlled thin and smooth brushing or spraying will ensure that the paint is applied without bubbles forming and smooth coverage is maintained. Finally, I control the spatial parameters like temperature, which should be kept at 50-85°F (10-29°C), and humidity below 50% because these conditions reduce curing-related issues and surface defects. Regularly stirring the paint and monitoring its level being covered also prevents bubble formation.
How to Paint Aluminum Diamond Plates for Specific Applications
A specialized approach is necessary when painting aluminum diamond plates for specific purposes. The exterior must be cleaned using a degreaser or a soap-and-water mixture to eliminate grease, dirt, or remnants. After the cleaning step, it is essential to use a metal primer specifically tailored for aluminum to ensure proper adhesion. Once the primer has dried, paint the aluminum diamond plate with quality metal paint, applying it in thin, even coats to avoid bubbles or uneven coverage. Ensure that the workspace while painting is within the preferred temperature range of 50-85°F (10-29°C) and humidity under 50%, as curing problems may arise if these conditions are not met. Adhere to set time frames for drying between applying additional coats and after the last coat for optimum durability and lasting effect.
Best Paints for Aluminum Tool Box Restoration
If you seek to restore an aluminum toolbox, I suggest using auto-alkyd enamel paints. They are weather-resistant, rugged, and adhesive-specific for metal surfaces, and unlike their counterparts, they survive decades of exposure to weather elements. According to my research, the most suitable options are Rust-Oleum Professional High-Performance Enamel, which has a finer and protective finish, and Dupli-Color Metalcast, which is made for high adhesion and polished appearance. If left unchecked, rust might be an issue, but it should not pose problems afterward if painted over. In such cases, POR-15 Rust Preventative Coating is needed for these concerns. Careful application and precision with these paints guarantee professional results on aluminum surfaces.
Using Automotive Paint on Diamond Plate Surfaces
Automotive paint requires proper preparation and application to achieve desirable results while maintaining diamond plate surfaces. Here are the specific steps to follow:
- Surface Preparation:
-
-
- Clean the diamond plate to remove grime, grease, and foreign particles. Use a degreaser or cleaning solvent specific to metal surfaces.
- To remove existing corrosion, rusted or oxidized sections must be sanded down using 120—to 220-grit sandpaper. Afterward, light scuffing of the entire surface, using scuff pads or fine sandpaper, is needed to improve adhesion further.
- To avoid moisture before painting, ensure the surface is washed and dried thoroughly.
-
- Primer Application:
-
-
- Utilize an etching primer for metal surfaces or self-etching ones, as they will chemically bond to Aluminum, ensuring adhesion for long periods.
- Apply the primer using an even hand into thin coats. Each coat must be allowed to dry according to the maker’s instructions, usually between 10 and 20 minutes.
-
- Choosing the Paint:
-
-
- For surfaces with diamond plates, automotive paints like acrylic enamel and epoxy-based or polyurethane coatings would be ideal. Check that the paint and primer used are suitable for Aluminum.
- For enduring results, the Rustoleum Professional High-Performance Enamel paint is ideal, while the Dupli-Color Metalcast is perfect for a polished look. For more excellent durability against corrosion and abrasion, use POR-15 Top Coat.
-
- Paint Application:
-
-
- Use a light hand to apply 2-3 coats of paint to the surface. Sufficient drying time should be observed between coats, which is usually 20-30 minutes, depending on the product instructions.
- Be sure to use an aerosol or spray gun to maintain even coverage, and ensure the recessed portions of the diamond plate patterns are also covered.
-
- Sealing and Finishing:
-
-
- Apply a clear coat for metal surfaces to strengthen the paint’s bond and protection further. These perform best when applied to acrylic or polyurethane clear coats that resist UV radiation and abrasion.
- The cure time varies between 24 and 72 hours, depending on the product used and the surrounding conditions.
-
Utilizing appropriately tailored products for automotive and metal applications with the previously stated steps will ensure a professional and long-lasting finish on diamond plate surfaces. However, always check the manufacturer’s specific product to avoid incompatibility and failure.
Painting Aluminum Diamond Plate for Outdoor Exposure
When preparing to paint an aluminum diamond plate exposed to the elements, I follow a meticulous step-by-step procedure to guarantee a stable and professional grade finish. The first step involves thoroughly washing the plate using an aluminum cleaner or a degreaser to remove any oil, dirt, or oxidized film. The second step consists of sanding the surface with more fine-grained sandpaper (320-400 grit) to make the surface smoother, which causes the surface to be more paintable. Additionally, after sanding, the surface is wiped with a clean cloth to remove any remaining dust.
Next, I apply a high-quality etching primer specifically formulated for aluminum, as it improves adhesion and mitigates corrosion. According to the manufacturer’s guidelines, the primer usually requires about 24 hours of drying time before the painting phase. For outdoor exposure, I suggest a durable acrylic or enamel paint of polyurethane composition that endures harsh weather and UV rays. At least two coats should be applied using a spray gun or roller for even distribution and maximum protection. Make sure to follow the instructions for drying time between coats.
For aspects, consider the following:
- Primer Specifications:
-
-
- Etching primer appropriate for aluminum, such as zinc chromate or equivalent
- Drying period before painting: Generally 24 hours at 70°F (21°C).
-
- Paint Type:
-
-
- Acrylic or total urethane enamel paint fortified with stabilizers for ultraviolet and weather shield siding.
- Outdoor resistant weathering abilities.
-
- Application Conditions:
-
-
- The preferred temperature range is between 50°F and 85°F (10°C to 29°C).
- Relative humidity readings below 65% allow for proper curing.
-
Meeting these parameters optimizes my ability to ensure outdoor resilience alongside maintaining the polished appearance of the aluminum diamond plate. Ensure to check label guidelines for tailored directions.
References
Frequently Asked Questions (FAQ)
Q: Why do I need to etch aluminum before painting?
A: Etching is crucial because aluminum oxidizes quickly when exposed to air, creating a surface where paint doesn’t stick well. When you etch aluminum, you create a rough surface with microscopic “teeth, ” allowing the paint to grip correctly. Self-etching primers or dedicated aluminum etch solutions chemically react with and etch the aluminum surface, ensuring proper adhesion. Without this step, even the best primer and paint system will likely fail over time, leading to peeling and flaking.
Q: What’s the best way to prime an aluminum diamond plate?
A: For the best results when priming an aluminum diamond plate, clean the surface thoroughly, removing any dust, oils, or residue. Then, a self-etching primer specifically designed for aluminum surfaces will be applied. Apply 2-3 light coats rather than one heavy coat, allowing each coat to air dry according to the manufacturer’s instructions. Some professionals recommend a zinc or wash primer as an excellent option for aluminum. The prime and paint system you choose must be compatible with aluminum to ensure proper adhesion and durability.
Q: How should I prepare aluminum before painting?
A: Thoroughly cleaning the surface is the first critical step in preparing aluminum before painting. Degrease with a solvent cleaner to remove oils, then wash with soap and water. Next, lightly sand the surface with 220-400 grit sandpaper to create mechanical adhesion. After sanding, clean again to remove any dust left on the surface. Apply an aluminum etch solution or use alodine treatment to prepare the surface chemically. This preparation process creates mechanical and chemical bonds for the paint to stick properly to the aluminum diamond plate.
Q: How long should I let prime and paint dry on the aluminum diamond plate?
A: After applying primer, allow it to dry according to the manufacturer’s specifications, typically 1-2 hours between coats and 24 hours before applying paint. Once the primer is completely dry, apply your topcoat paint in multiple light coats. Let the paint dry for at least 24-48 hours before light use, but understand that most automotive-grade paints take 7-30 days to cure for maximum hardness and durability. Rushing this process may compromise adhesion and durability. For a better experience and results, please consider allowing extra drying time in humid conditions.
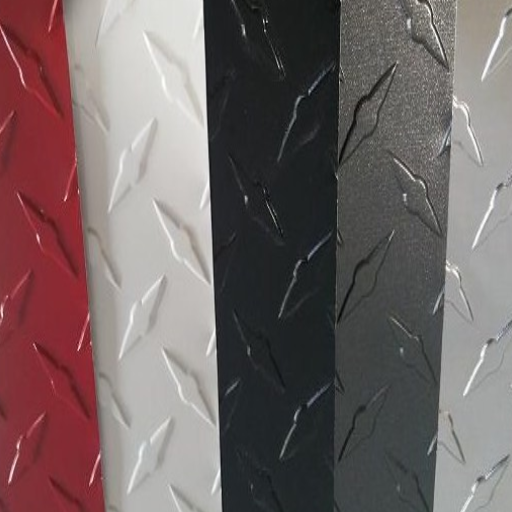
Q: What kind of paint works best on aluminum diamond plate?
A: For aluminum diamond plates, acrylic urethane or polyurethane paints offer excellent durability and resistance to chipping. Professional-grade automotive paints (car paint) work exceptionally well as they’re designed to withstand extreme conditions. Epoxy-based paints also provide outstanding adhesion and durability. For high-traffic areas, consider specialized coatings like bedliner products, which offer superior protection against scratches. Whatever paint you choose, ensure it’s rated explicitly for use on metal surfaces, and always use it as part of a complete system with the appropriate primer to keep the paint adhered properly for years.
Q: Why does paint sometimes not stick to an aluminum diamond plate?
A: Paint doesn’t stick properly to aluminum for several reasons. First, aluminum oxidizes rapidly, creating an invisible barrier between the metal and the paint. Second, aluminum is naturally smooth, providing little mechanical grip for paint. Third, oils or contaminants left on the surface prevent adhesion. To solve these issues, properly clean the surface, use chemical etching to remove oxidation, apply a self-etching primer that chemically bonds to aluminum, and choose a paint system designed for metal surfaces. If your browser, before proceeding with your project, shows warning messages that JavaScript is disabled while researching techniques, please enable JavaScript for a better experience with instructional videos.
Q: How can I fix it if I scratch the paint on my aluminum diamond plate?
A: First, clean the damaged area thoroughly to repair scratched paint on an aluminum diamond plate. Lightly sand the area with fine-grit sandpaper (400-600 grit) for minor scratches. Clean again to remove any dust. If exposed, apply a small amount of self-etching primer to the bare aluminum and let it sit until completely dry. Touch up with matching paint using a small brush or touch-up pen, applying thin layers rather than one thick coat. Allow each coat to dry thoroughly before applying another. Once the paint is completely dry, you may use a clear coat for additional protection. For deep scratches that expose large areas of aluminum, you might need to repeat the full prime and paint process.
Q: What safety precautions should I take when painting an aluminum diamond plate?
A: Always work in a well-ventilated area or outdoors when painting aluminum diamond plates. Wear appropriate protective equipment, including a respirator mask rated for paint fumes and not just a dust mask. Use chemical-resistant gloves to protect your skin when handling etching solutions, primers, and paints. Wear safety glasses to protect your eyes from splashes. Keep all chemicals away from heat sources, as many primers and paints are flammable. If your project is large or enclosed, please consider using explosion-proof fans for ventilation. Follow all manufacturer instructions on your products, and dispose of waste materials properly according to local regulations.


