
Brass plating steel combines aesthetics with practicality, giving your steel projects a striking golden finish while enhancing durability. As a DIY enthusiast or professional craftsman, every project requires the right tools, techniques, and understanding of the materials involved to achieve a perfect brass plate finish. This guide will take you through the entire process of brass plating steel with a brass plating kit.
This post comprehensively covers everything you need to know, from preparing the steel surface for plating to applying the brass coating and troubleshooting common issues. By the end, you will have the knowledge and confidence to transform any steel surface into a beautifully plated brass masterpiece.
What Equipment Do You Need for Brass Plating Steel?

To successfully brass plate steel, the following equipment is required:
- Brass plating kit (typically includes plating solution and anodes)
- Steel item to be plated
- Supplies (degreasers or acetone) for surface cleaning
- Sandpaper or buffing pads for polishing
- Gloves, goggles, and an apron for protection
- Power supply for electroplating processes
Essential Components in a Quality Brass Plating Kit
- Brass Plating Solution
The plating solution usually consists of copper and zinc ion compounds in the proper ratio to achieve a uniform brass finish. Many solutions utilize 4-6 pH for best results. To achieve a uniform coating, it is generally recommended to add 10-20 g/L of alloy compound to the solution.
- Anodes
Brass alloy anodes and copper anodes are commonly preferred. These anodes provide the required ions in the electroplating process. The surface area ratio should be 2:1 anode to cathode for best results.
- Power Supply
Quality plating requires a reliable and constant DC supply. Metal plating voltage usually falls within the 2-4 volts range and depends heavily on the object’s size, conductivity, and the measure to be plated. On the other hand, the current’s density should not exceed 1.5-3 A/dm².
- Pre-Cleaning Agents
Proper surface preparation ensures good adhesion, so thoroughly cleaning using degreasers, alkaline cleaners, or acetone is paramount. Stripping all dirt contaminants, such as oil or rust, is also fundamental.
- Polishing Materials
Before plating, the surface must be sanded using 400-1200 grit sandpaper and buffing sanders. A polished surface will have fewer scratches, significantly improving the overall finish.
- Protective Coatings or Sealers
A lacquer or protective sealer is usually used after plating to enhance the durability of the brass finish. This avoids oxidation and increases durability.
Ensuring the quality of all these components will impact the success of the brass plating process. You should follow safety regulations and the specific technical details corresponding to the materials and equipment utilized.
Preparing Your Workspace for Safe Brass Electroplating
When organizing a workspace for brass electroplating, I consider safety and precision, so I always follow these steps. First, I ensure the area is well-ventilated, or I utilize a fume hood to ensure my safety and avoid inhaling toxic fumes from the plating solutions. Chemical splash and electrical hazard PPE such as gloves, goggles, and lab coats are critical for safety.
Safety and efficiency during the procedure are made possible by carefully organizing tools and materials. For example, I set up a workstation surface made of a non-conductive material and ensured that all electrical connections were adequately insulated. Keeping the plating solution at the recommended temperature range of 120–140°F (49–60°C) and setting the power supply voltage to optimal levels, generally between 2-4 volts for brass, are some things I check.
Finally, I incorporate safe storage of sensitive chemicals and take care of all hazardous waste disposal to reduce environmental risk. Following these guidelines allows me to support a safe and efficient workspace for brass electroplating.
How to Prepare Steel Surfaces for Brass Plating?

To prepare steel surfaces for brass plating, begin cleaning the steel surface thoroughly to eliminate contaminants like dirt, grease, or oil. This can be achieved with a degreaser or an alkaline cleaning solution. Following that, some fine abrasive or sandblasting will remove oxides and produce a moderately roughened surface, enhancing adhesion. After sanding, the steel part is immersed in an acid etch solution to remove residues and activate the surface. Lastly, the steel part is deionized and rinsed to remove any residue before embarking on the brass plating.
Proper Cleaning and Degreasing Techniques for Steel
I first identify the proper cleaning solution to ensure the steel is clean and degreased. It is usually a degreaser or alkaline cleaner based on the contaminant. Removing any dirt, grease, or oil on the steel surface is also critical, as it is essential for acheiving good adhesion during plating or coating. I utilize fine abrasives or sandblasting to remove the oxides and prepare the surface. After that step, I place the steel in an acid etch solution to remove residual impurities. Rinsing the steel with deionized water improves the effectiveness of these pre-treatments by washing away any potential contaminants. These procedures clean the steel and further enhance its readiness for additional treatments.
Wire Brush and Other Surface Preparation Methods
Brushing with wire tools improves the rate at which rust, old coatings, and scale are removed from metallic surfaces. While this is a common approach for cleaning, it is most effective when a high level of precision while minimizing material removal is required. Wire tools can be bought as carbon or stainless steel, come in different grades, and can be manually applied or used with power tools for better productivity.
The success of wire brushing depends on the specific wire brush being used, the pressure applied, and the tool’s speed. For example, power wire brushing is done between 3,000 and 8,000 RPM, depending on the application and material type. Stainless steel wire brushes are commonly used because they do not cross-contaminate or cause corrosion in aluminum and stainless steel materials.
Prep for surface treatment may also include grinding and blasting with abrasives and chemical methods. Abrasive blasting gives a more even coating when using grit between 16 and 120. Expect deeper removal of imperfections with angle grinders or belt sanders. Exposed blades with rust and oxide layers receive thorough cleansing using phosphoric acid, which falls under chemical treatment, making them ideal for polishing.
Exercise caution regarding the substrate material and surface treatment required for preparing coating or plating during surface selection. Thorough prepping enhances and lasts the durability of bonds and treatments. Adhere to protective measures to ensure sound and effective operation.
Should You Add a Nickel Plated Layer Before Brass Coating?
In my opinion, incorporating a nickel-plated layer on top of the brass coating will significantly improve the quality and performance of the final shade. From my experience, course nickel provides additional protection on intermediary layers for adhesion to enhance the bond between the base and the brass coating while preventing further corrosion. This is of great value on substrates made of steel or zinc alloys. Things to remember are:
- Nickel Layer Thickness: It is between 5 and 10 microns, within the coverage and strength needed for most purposes.
- Surface Preparation: To facilitate uniform plating, the substrate must be thoroughly cleaned and free of impurities and scratches.
- Plating Bath Conditions: Nickel plating takes place at 60 – 71°C and a current density of 2-5 A/dm², which is exclusive for this plating and works best at 140-160°F (60-71°C).
To conclude, adding a nickel underlayer to boost corrosion resistance will improve the durability and appeal of brass plating; therefore, this step should be taken in most scenarios.
How to Achieve Heavy Brass Plating on Steel?

- Surface Cleaning: Start by steam cleaning the sides of the steel surface to remove impurities like grease and oxidation, using tools like alkaline cleaners or ultrasonic cleaning tools.
- Pre-Treatment: To guarantee adhesion, ensure the acidic pickling process is completed before the primary treatment with the steel substrate is conducted.
- Nickel Underlayer: Polish the steel using a nickel underlayer to increase adhesion and corrosion resistance and build a smooth base for the brass.
- Brass Plating Bath: The steel with nickel plating should be put in a brass plating bath with the correct solution, temperature (generally set at 120-140F with 20F adjustable external heaters), and current density. Bath chemistry can be altered as required for heavier deposits.
- Post-Plating Finishing: After rinsing the plated steel, put a protective top coat or polish it to improve its durability and aesthetics.
With these steps applied precisely, a heavy and appealing appearance is added to steel substrates.
Techniques for Building Up a Solid Brass Layer on Steel
To achieve a thick layer of brass on steel, specific steps must be taken about the process parameters, including adhesion, thickness, uniformity, and optimization:
- Pre-Treatment of Steel: A contamination-free area must be established by thoroughly cleaning and degreasing to facilitate deposition. Sandblasting and other forms of mechanical abrasion are sometimes employed to increase surface roughness, enhancing bonding.
- Choice of Plating Solution: The plating solution must be tarnish-free and contain proper proportions of copper sulfate (15 – 25 g/L), zinc sulfate (10-12 g/L), and cyanide with copper. A mixture of these compounds must have a pH between 9 and 11 to maximize plating effectiveness.
- Controlled Temperature and Current Density: The preferred bath temperature is roughly 54C or 130F, as this enhances ion mobility. Electroplating is usually performed between 0.5 and 3.0 A/dm² for current density control, depending on the thickness requirements.
- Agitation and Filtration: Scrubbing to prevent sediment and other impurities from harming plating is essential to provide uniform cleanliness. Stirring and air agitation can also help improve uniformity and enhance shuttle aids.
- Layer Building: If a thicker deposit is needed, apply the brass coating in thin layers. This method aids in managing internal stresses and improves the overall finish.
- Post-Plating Treatment: Rinse the steel thoroughly after plating it with brass before applying lacquer or sealant. Depending on the intended use, layered decorative applications may require 5-30 microns of coating, while durable uses may need between 50-100 microns.
A quality brass layer can easily be achieved by managing these parameters with strict monitoring and control.
Using Electroplate Methods for Thick Brass Coatings
In obtaining thick brass coatings through electroplating, I follow a methodical approach to ensure even application and durability. I first clean the substrate surface and remove grossly visible impurities through polishing. Afterward, I prepare an electroplating solution with brass, which consists of copper and zinc ions, while ensuring the pH remains between 6.0 and 8.0 for optimal deposition. I maintain a current density of 2-4 A/dm² to ensure no burning or uneven layers. Further, I keep the temperature at 50-60ºC since that allows smooth plating. I proportionally extend the plating time for thicker coatings but monitor the stress to avoid cracks in the brass layer. Solution agitation and periodic filtration guarantee uniformity and no homogenous defects. Following this procedure, I achieve brass coatings from 50 to 100 microns, which can be used for wear-resistant, decorative coatings.
What are the common problems when brass plating steel is used?
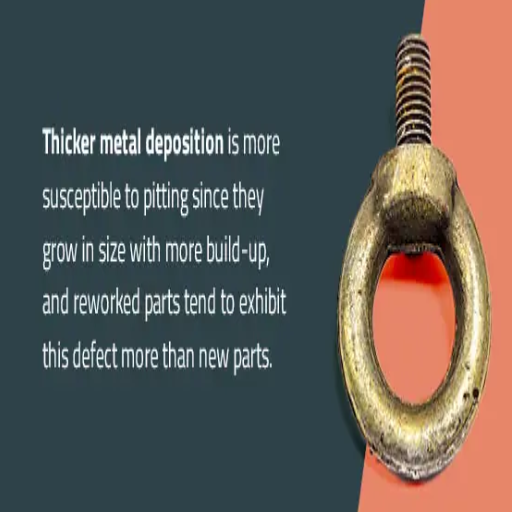
If not controlled meticulously, brass plating steel can run into various significant issues. An example is the bonding deficiency of the brass coating to the steel substrate. This is frequently the result of poor surface preparation or contamination. Other issues include the uneven current distribution during the plating process, which may result in insufficient agitation and uneven plating thickness. Also, stress in the coating’s brass layer can result in a crack form, especially in thicker layers. If proper pretreatment of the steel is not carried out, there is a greater risk of corrosion beneath the brass layer. These problems can be solved by ensuring adequate cleaning, controlled plating conditions, and controlled post-plating processes.
Troubleshooting Uneven Brass Plating and Adhesion Issues
In my view, uneven brass plating is often the result of insufficient agitation or current density control during the plating cycle. To resolve this, I ensure that there is uniform agitation within the plating bath and that the voltage levels do not fluctuate. Mechanically induced adhesion failures are most often the result of inadequate surface treatment. In that regard, I ensure the steel substrate is clean and adequately pre-treated to remove all contaminants. It is also important to note that I am cautious about the level of stress induced in the brass layer because excess thickness increases the risk of cracking. Thus, I limit myself to optimal plating thickness without compromising structural integrity. Careful control of these factors has heightened my results to a fantastic level.
Preventing Corrosion Between Brass and Steel Layers
Steering clear of corrosion in the brass and steel layers incorporating several essential practices focuses on the performance and lifecycle durability of the product. The following elements are key to success:
- Surface Preparation: Decontaminating the steel substrate includes removing oils, grease, or oxides that can obstruct clean surfaces. Based on controlled adhesion tests, abrasive cleaning techniques like sandblasting or caustic cleaners are highly suggested.
- Proper Pre-Treatment: An appropriate pre-treatment, such as an undercoat of nickel or zinc, can prevent galvanic corrosion by acting as a barrier to restrict the direct contact of brass with steel.
- Optimal Plating Thickness: For decorative purposes, brass plating should be no less than 5 µm and no more than 15 µm, while for functional purposes, it should be 15–30 µm. Failure to meet these specifications may result in excess stress due to thick plating or brittle material due to insufficient thickness, leading to loss of structural integrity and corrosion resistance.
- Stress Control in the Brass Layer: Change the plating parameters of temperature, current density, and electrolyte to reduce internal stress and avoid cracking. For instance:
-
-
- Plating bath temperature: 60–70°C
- Current density: 2–4 A/dm²
- pH level of electrolyte solution: 6–7.5
-
- Sealant Application: Use lacquer or chromate conversion coating to reduce the environment’s exposure and moisture and shield the brass layer from corrosion.
- Inspection and Quality Assurance: To ensure the effectiveness of quality control measures, regular inspections with X-ray fluorescence (XRF) analysis should be used to measure plating thickness and identify defects.
Combining these measures with rigorous monitoring and maintenance practices dramatically minimizes the chances of corroding brass and steel layers while extending the plated component’s lifecycle.
Solutions When Your Plating Solution Isn’t Working
Ensuring the plating solution works every time can be tedious. For troubleshooting purposes, I follow the steps outlined below:
- Check Solution Chemistry: I ensure everything is within the range of the concentration of the plating bath’s chemicals. For example, the pH would need to be somewhere between 4.0 and 6.0 in nickel plating. Also, check the ratios of metal salts, additives, and brighteners according to the manufacturer’s instructions.
- Measure Temperature: Almost every plating solution has specific temperature ranges. For example, nickel plating baths work best between 120°F and 150°F (49°C to 65°C). I ensure that I use a calibrated thermometer to check for accuracy.
- Inspect Electrical Parameters: I check the current density controls to confirm that they are within the specified range based on the materials used and the thickness of the plating. Low or high current tends to improve deposit adhesion, which results in uneven deposit creation. For nickel plating, it is usually in the range of 2 to 10 A/dm².
- Check for Contamination: If contaminants are present, the solution may show signs such as inconsistent plating or cloudy deposits. In such situations, filtration or some form of active carbon treatment is used to eliminate the organic impurities.
- Analyze Surface Preparation: Cleaning and surface activation are equally important. Steps like degreasing, acid dipping, or abrasive cleaning are evaluated to confirm parts readiness before treatment.
Routine maintenance on these parameters allows me to detect or correct plating performance issues.
How to Finish and Protect Your Brass-Plated Steel?

When completing and finishing your brass plated steel, the first step is protecting the brass from tarnishing, corrosion, and other damage. This can be done by applying a clear lacquer or polyurethane coat. This coating protects the brass surface and improves its mechanical properties. Regular maintenance, such as soft cloth and non-abrasive cleaner, can remove dirt and maintain its shine. It is essential not to use harsh abrasives or chemicals as they can damage the piece. For long-term care, items should be stored in a dry location to limit moisture exposure and protective coatings should be reapplied to ensure further durability.
Achieving a Bright Brass Finish Through Polishing
I begin with a purchased or homemade polish consisting of vinegar, flour, and salt. To achieve a bright polish, I use a soft cloth and apply the polish with circular motions. Afterward, I buff the polish with a clean, dry cloth to reveal the shine. If necessary, I will repeat this process for heavily tarnished areas. For intricate designs, I use brushes so as not to scratch the surface. The last step is to wipe it down to get a mirror-like finish that is residue-free.
Best Lacquer Options for Protecting Your Brass Coating
Protection of bronze items is critical and requires specific methods. Eagle bronze polish, for example, states that “brand new” bronze should have a protective sealant. Based on the content, here are the best protective sealants:
- Everbrite Protective Coating
-
-
- Key Features: Provides UV protection, prevents tarnishing, and enhances the reflective shine of brass.
- Coverage: 250 sq. ft. per quart.
- Application Methods: Brush, roller, or spray.
- Dry Time: Touch-dry in 30-60 minutes.
- Best For: Outdoor brass items exposed to sunlight and moisture.
- Key Features: Provides UV protection, prevents tarnishing, and enhances the reflective shine of brass.
-
- Krylon Clear Lacquer Spray
-
-
- Key Features: Applies with an easy-to-use spray, quick-drying, and long-lasting clear gloss finish.
- Dry Time: Dehydrated in 2 hours.
- Temperature Range for Application: From 50°F to 90°F.
- Finish Type: Clear gloss or satin.
- Best For: Striking more minor brass adornments or pieces with intricate designs.
- Key Features: Applies with an easy-to-use spray, quick-drying, and long-lasting clear gloss finish.
-
- ProtectaClear Coating
-
-
- Key Features: This thin, hard coating is designed for brass and metal surfaces and is scratch—and corrosion-resistant.
- Coverage: 1,000 sq. ft. per gallon.
- Application Methods: Wipe, brush, or spray.
- Dry Time: Touch dry in 1-2 hours. Fully cured in 4-5 days.
- VOC Content: There is a low amount of VOC, which is less harmful to health.
- Best For: Carried around brass railings or frequently handled pieces.
- Key Features: This thin, hard coating is designed for brass and metal surfaces and is scratch—and corrosion-resistant.
-
Depending on item type and exposure conditions, these lacquers are excellent choices to protect your brass. Remember, for best results, the surface needs to be free from tarnish before coating is applied.
Long-term Care for Brass-Plated Steel Items
To maintain critical care of brass-plated steel items, it is essential to prevent surface buildup, which can be done through regular dusting with a dry and soft cloth. To achieve deeper cleaning, one can use a solution of warm water along with mild soap, but it is crucial to ensure that no harsh abrasive materials are used that can damage the brass plating. After cleaning, the piece should be dried thoroughly to avoid water spots or corrosion. The finish can be preserved by applying thin layers of high-quality furniture wax or polish. However, avoiding harsh chemicals is recommended since they can strip the plating in the long run. If exposure to outdoor conditions is unavoidable, reapplication of protective clear lacquer every one to two years can help safeguard against moisture and sun damage. Maintaining a pH-neutral level of 7 with any used cleaning product and using low VOC protective lacquer on metal guard surfaces is advised. Items made from brass-plated steel require maintenance on a tri-annual basis to ensure they stay in optimal condition.
References
Frequently Asked Questions (FAQ)
Q: Using a brass plating kit, what are the basic steps to electroplate brass onto a metal surface?
A: To electroplate brass onto steel or other base metal surfaces, follow these steps: First, thoroughly clean the steel surface to remove all oils, dirt, and oxidation. Next, apply an appropriate metal cleaner provided in the kit. Then, connect the piece to the negative terminal of your power supply. Dip the anode (usually attached to the positive terminal) into the brass plating solution and brush it over the surface of your steel workpiece. Maintain consistent contact while moving the brush to deposit a thin layer of brass onto the surface. Continue until you achieve the desired brass color and thickness. Finally, rinse the plated item thoroughly and apply a clear protective coating to prevent tarnishing. Kits from Caswell Inc. provide all necessary plating chemicals and detailed instructions.
Q: Is there a great new way to brush plate small parts that’s more efficient?
A: There is a great new way to brush plate small parts more efficiently. Instead of traditional immersion plating, you can use a brush plating method that gives you more control. You can create a setup for small parts where the plating solution flows through a brass brush or specialized plating tool while conducting current. This method allows you to precisely plate directly onto steel and other metals. Caswell and different manufacturers offer specialized “Plug N Plate” systems designed specifically for brush plating small components. This technique is beneficial for intricate items where you must selectively apply brass or when dealing with items too large for immersion tanks. You’ll have a professionally plated finish, even on tiny components.
Q: How do I prepare my metal surface properly before using a brass plating kit?
A: Proper surface preparation is critical for successful brass plating. Start by thoroughly cleaning the bare steel or base metal using a degreaser to remove all oils and contaminants. Next, lightly sand the surface with fine-grit sandpaper (around 400-600 grit) to create a slightly textured surface for better adhesion. After sanding, clean again with acetone or alcohol to remove any dust. For steel specifically, you may need to apply an acid activation solution (often included in Caswell kits) to remove any oxidation and adequately prepare the surface. Some players recommend applying a layer of bright nickel before the brass for better adhesion, as brass is an alloy and sometimes challenging to plate directly. Wear protective gear throughout this process, as plating chemicals can be hazardous.
Q: Can I use a brass plating kit to brush plate small parts for jewelry making?
A: Absolutely; a brass plating kit is excellent for brush plating small parts for jewelry making. The technique allows you to apply a controlled amount of brass onto inexpensive steel or other metal bases to create beautiful brass-finished jewelry components. Use the brush plating technique to apply the solution with a special anode brush connected to your power supply for best results. This way, you can brush plate small items, giving you precise control over the plating area without needing a large tank setup. Remember that since brass is an alloy of copper and zinc, the color can vary depending on the composition of your plating solution. You might finish with a clear protective coating for jewelry applications, as brass plating can tarnish when exposed to skin oils and moisture.
Q: What equipment is included in a Caswell brass plating kit?
A: A typical Caswell brass plating kit includes several essential components for successful plating. You’ll receive brass plating solution (usually enough to plate several square feet), a specialized brush anode, connecting wires and clips for the electrical circuit, metal preparation chemicals (including cleaners and activators), detailed instructions, and sometimes a tiny power rectifier or recommendations for power settings if using your own. Caswell Inc. is known for providing comprehensive kits that include everything needed to start playing immediately. Their “Plug N Plate” systems are particularly popular for small-scale brush plating. Premium kits might include brighteners to enhance the finish, neutralizing solutions for after-plating treatment, and protective equipment like gloves and eye protection. All chemicals come properly labeled with safety information.
Q: Why would I plate steel with brass instead of finding a plating shop to do it?
A: Plating steel with brass yourself instead of using a professional plating shop offers several advantages. First, it’s significantly more cost-effective, especially for small or one-off projects. Professional plating shops often have minimum order requirements or setup fees, making small jobs prohibitively expensive. Second, you gain immediate control over the process and can adjust on the fly to achieve your desired finish. Third, you can plate precisely where needed – many DIY enthusiasts use brass plating kits to restore specific parts of antiques or create custom finishes on projects. DIY kits like those from Caswell allow you to plate directly onto your steel pieces at your convenience without waiting for shop turnaround times. Learning to plate yourself is also a valuable skill that can be applied to numerous future projects. However, you might still want to find a plating shop with larger-capacity equipment for large-scale industrial needs.
Q: Can I use a brass wire brush with the plating solution as an alternative to brush-plate small objects?
A: Using a standard brass wire brush with a plating solution is not recommended as an alternative way to brush plate small objects. While it might seem logical, a regular brass wire brush is not designed to conduct electricity properly for electroplating and may contaminate your plating solution. Instead, proper brush plating requires a specialized anode brush explicitly designed for electroplating that connects to your power supply. These specialized tools ensure consistent current distribution and proper plating adhesion. Caswell and other manufacturers provide the correct brushes in their kits that are designed to hold the plating solution while conducting the necessary current. If you’re looking for an economical approach for small parts, consider the swab method using cotton wrapped around a proper anode mentioned in Practical Machinist forums as an effective technique for detailed work.
Q: Can different brass color variations be achieved when electroplating onto steel?
A: Achieving different brass color variations when electroplating onto steel is possible. Since brass is an alloy of copper and zinc, adjusting the ratio of these metals in your plating solution can produce shades ranging from reddish (high copper) to yellowish (high zinc) brass. Commercial kits from suppliers like Caswell Inc. sometimes offer different brass formulations for varied finishes. Additionally, plating time and current density affect color—lower currents often produce warmer tones, while higher currents can create brighter finishes. After plating, you can apply patinas or antiquing solutions to create aged or weathered looks for even more variety. Some enthusiasts have documented their experiments with brass plating variations in forums like Practical Machinist and Mac Life Magazine on plating an iPod using different techniques to achieve unique finishes. Remember that a clear protective coating is recommended after reaching your desired brass color to prevent natural tarnishing.
Q: How long does brass plating take, and how durable is the result?
A: Brass plating can take anywhere from 15 minutes to several hours, depending on the size of your project, the desired thickness, and the method used. Brush plating small parts typically requires 10-30 minutes of active brushing to achieve a good finish, while larger pieces may need multiple sessions. As for durability, properly applied brass plating is moderately durable but not as hard-wearing as chrome or nickel plating. The thin layer of brass onto steel provides good corrosion resistance and an attractive finish, but it can scratch and wear over time, especially on frequently handled items. Most players recommend applying a clear protective lacquer after plating to maximize durability. Factors affecting durability include the thoroughness of your pre-plating preparation, the thickness of your brass deposit, and the protective coating used. For items that will see heavy wear, consider using brass plating primarily for decorative purposes or areas with minimal contact.


